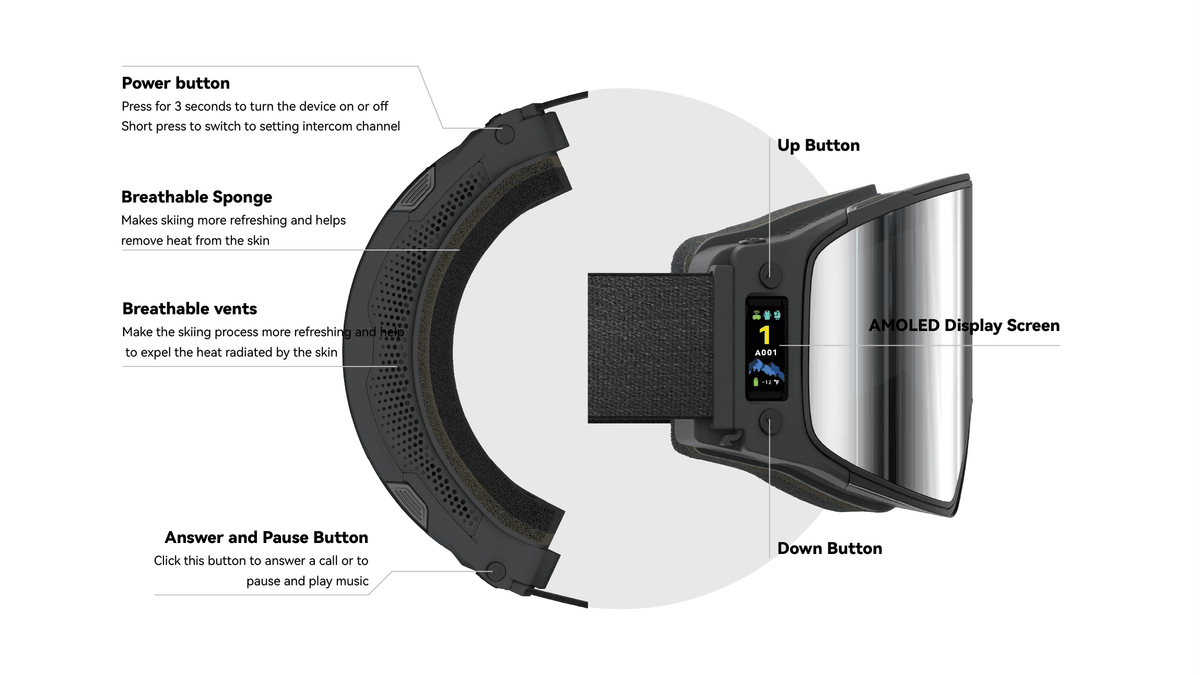

Hardware Overview
Parts Introduction


Hardware Overview
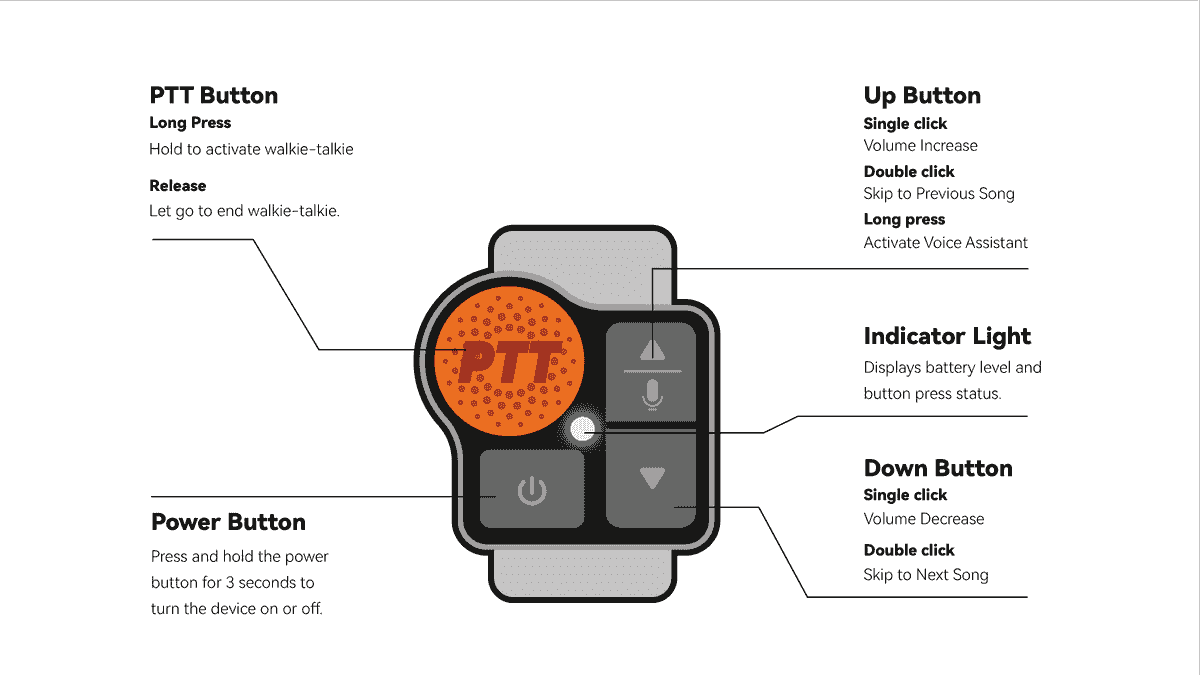
Buttons Introduction

Up Button
Single Click
In Volume Mode: Increases the volume by one level, with each increment accompanied by a corresponding "du" sound, which gets louder as the volume increases.
In Channel Setting Mode: Each press increases the channel number by 1, and the current channel number is announced in English with a prompt tone when setting the channel.
Double Click
Play the previous song
Long press
Long press for 3 seconds to enter remote control pairing mode

Down Button
Single Click
In the volume setting mode: reduce the volume, a prompt tone will sound for each volume reduction, the lower the volume, the lower the prompt tone "du"
In the channel setting mode: each time the channel number is pressed -1, a prompt tone will sound when setting the channel to indicate the current number
Double Click
Play next song
Click + long press
Enter reset, the prompt sound is "reset" First click once, then long press for 3s to enter
long press
Long press for 5 seconds to turn off the sub-audio code function

Power Button
Single Click
Short press to switch to walkie-talkiechannel setting. If there is no operation on the "↑" or "↓" buttons within 5 seconds after switching to the walkie-talkie channel setting, the device will exit the channel setting and return to the volume setting.
Long press
Long press for 3s to turn on or off

Answer Call and Play Pause Button
Single click
Playing a song: Tap to pause the song
Incoming call: Tap to answer the call, long press to hang up.
During a call: Tap to hang up.
Outgoing call: Tap to hang up, with a prompt tone following the mobile system's prompt tone.
Long press
Long press for 3s to wake up the voice assistant

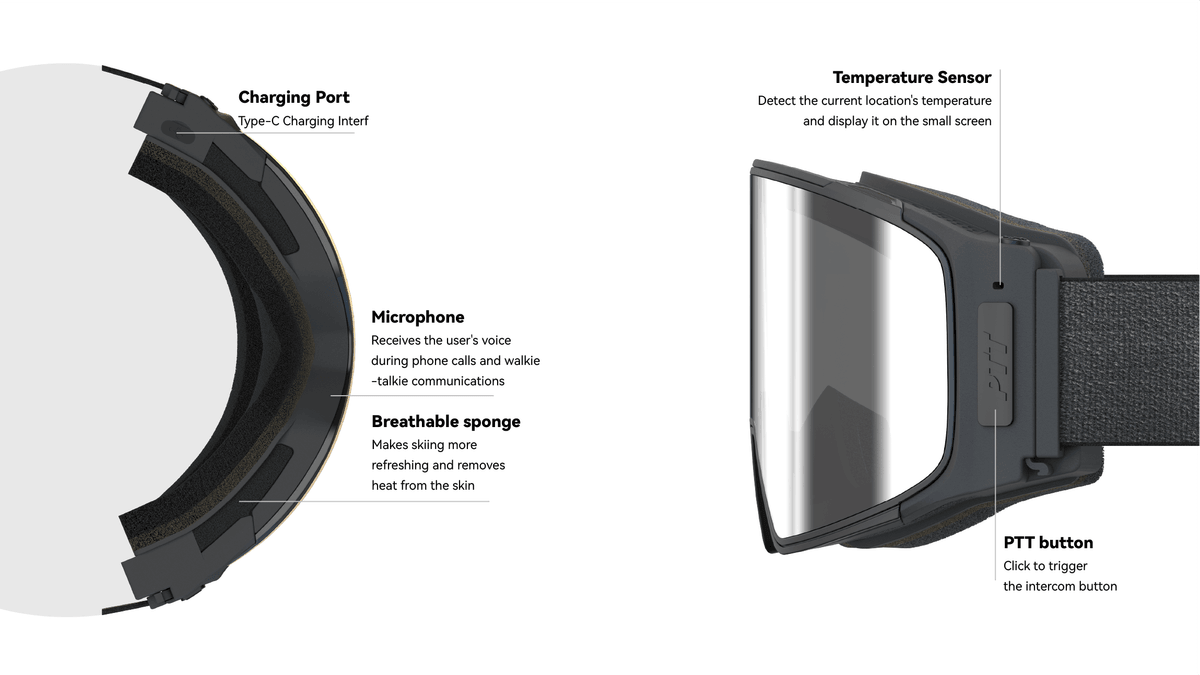
PTT Intercom Button
Long press
Press to start intercom, prompt tone "du"
Release to end intercom, prompt tone "du~du~"
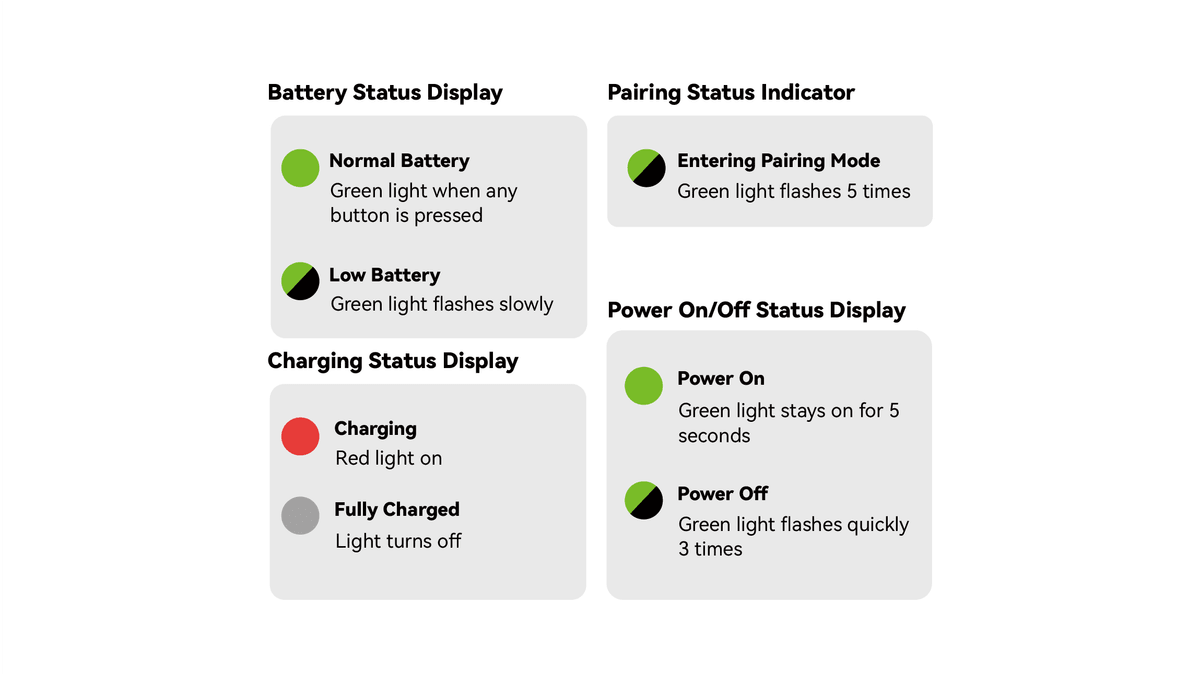
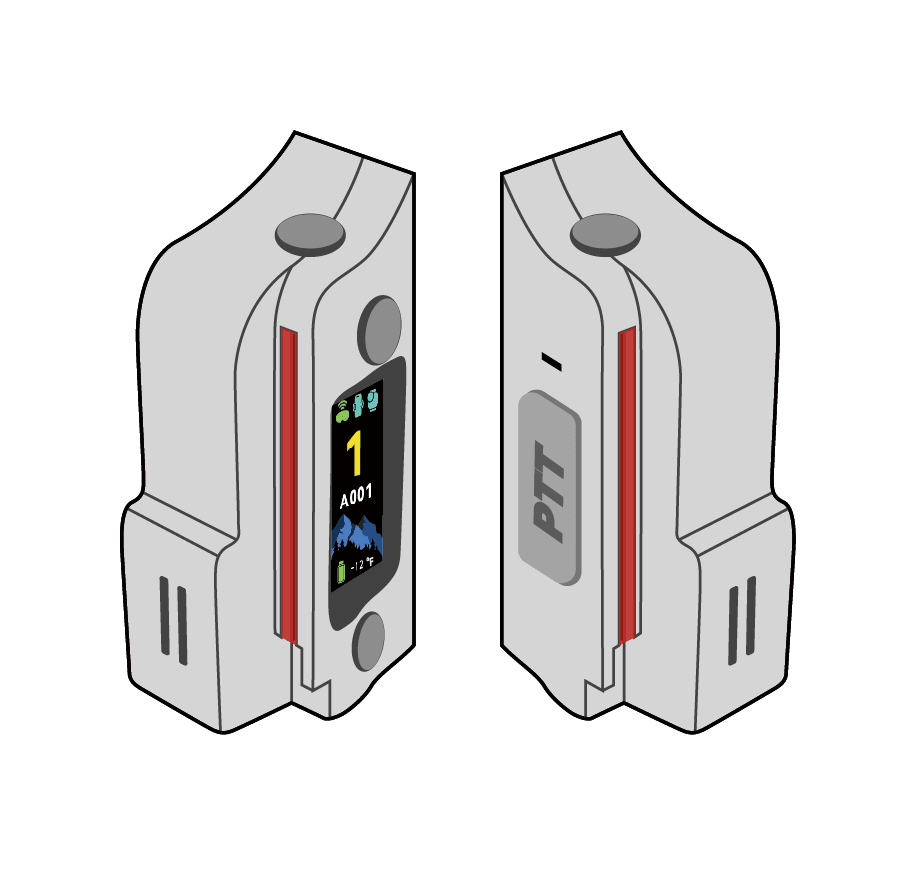
G03K Intercom Remote Control Hardware Introduction
G03K Parts & Functions Overview
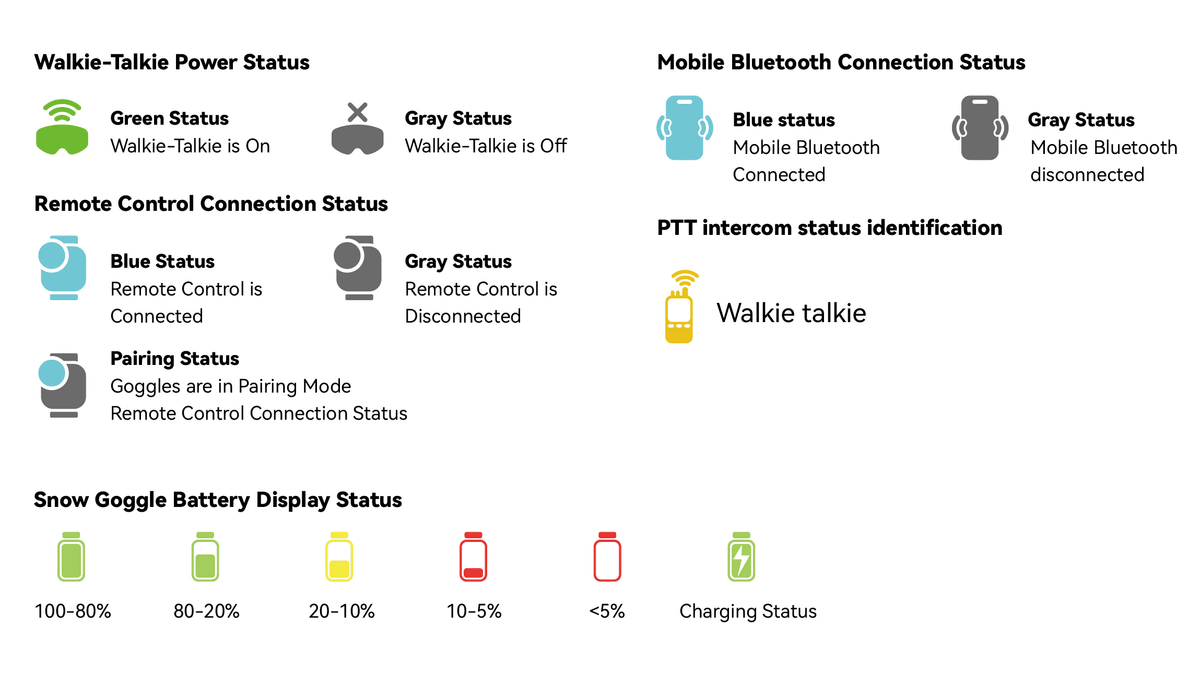
Indicator Light Color Codes

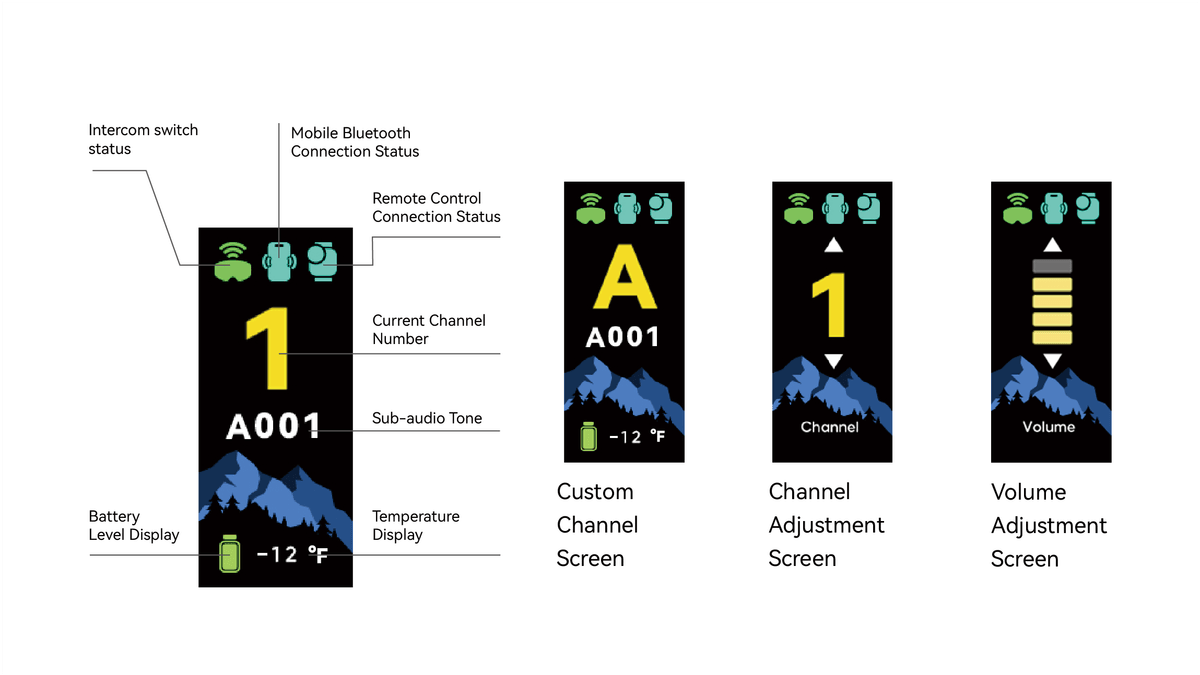
Screen UI Introduction
Screen Home Page Introduction
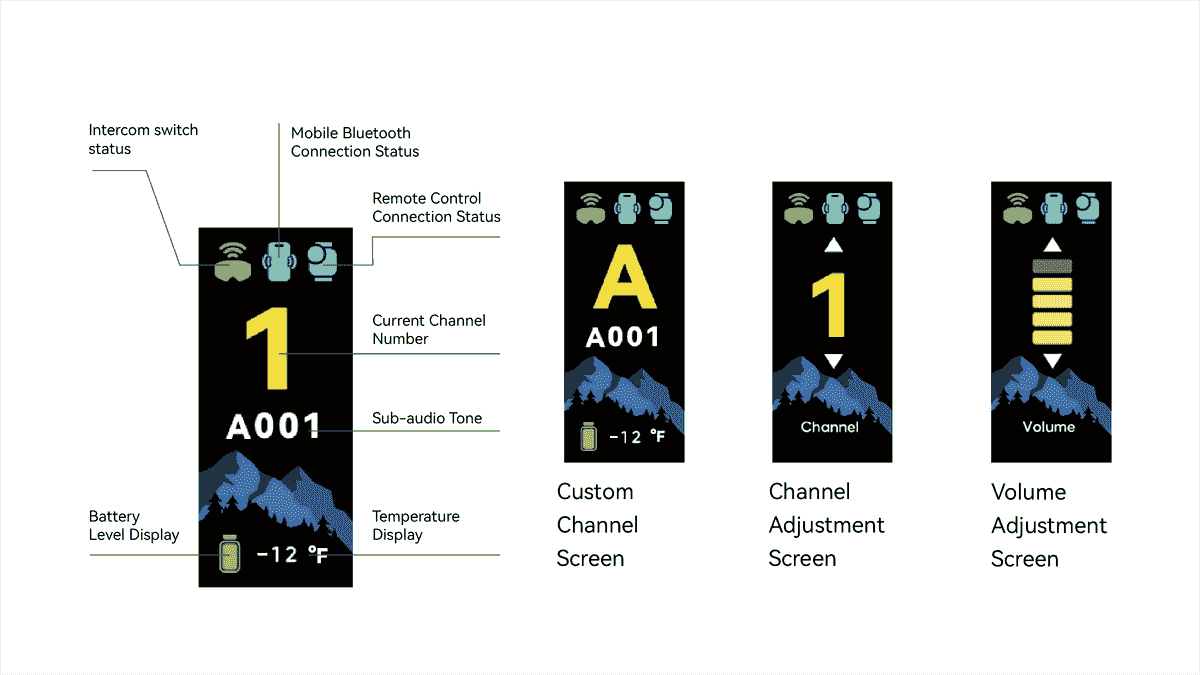
Status Introduction
Introducing the Functions of iCON in Different States

Download App
By downloading our App, you can unlock more operations and use more features!
Notice:
1. The QR code below is the APK file for downloading the Android version.
2. The QR code below has been tested for safety. You can download it with confidence. After scanning, there will be advertising pop-ups on the interface. Don’t be nervous. Just close the advertising pop-ups. It will not have any impact on your security.
3. Apple users, please go to the App Store and search for SKIGOMAX to download the latest version of the APP.

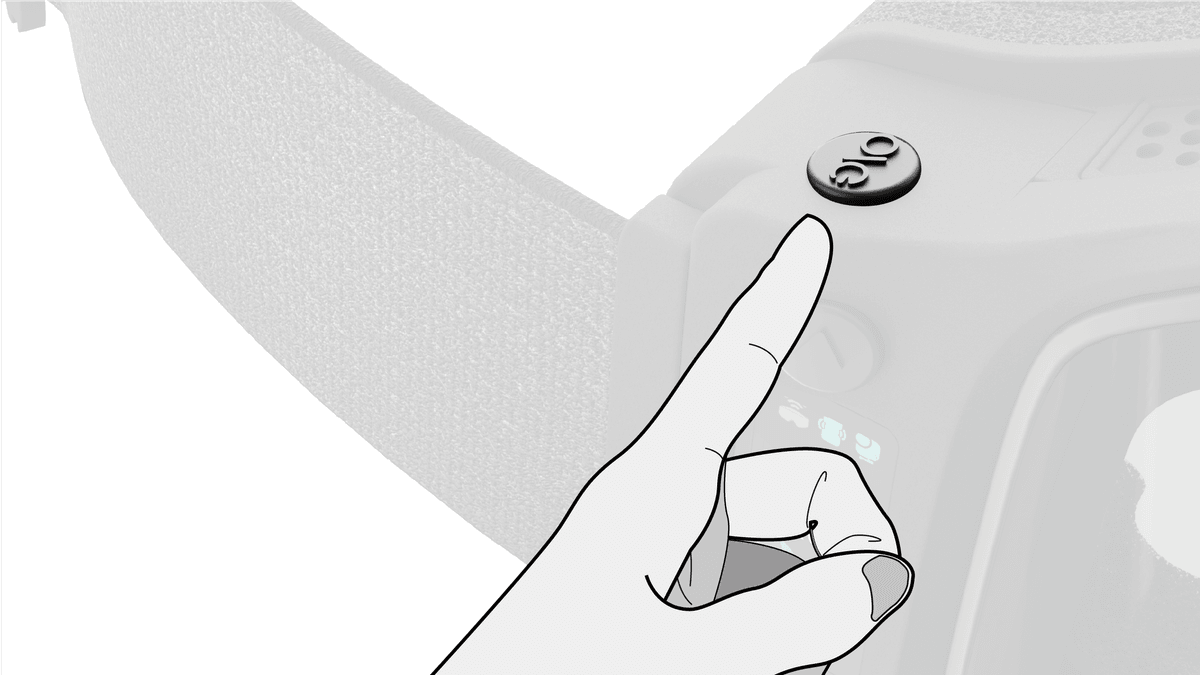
How to Turn the Device On/Off
As shown in the diagram on the right, press and hold the button at the top end of the screen for 3 seconds to power the device on or off.

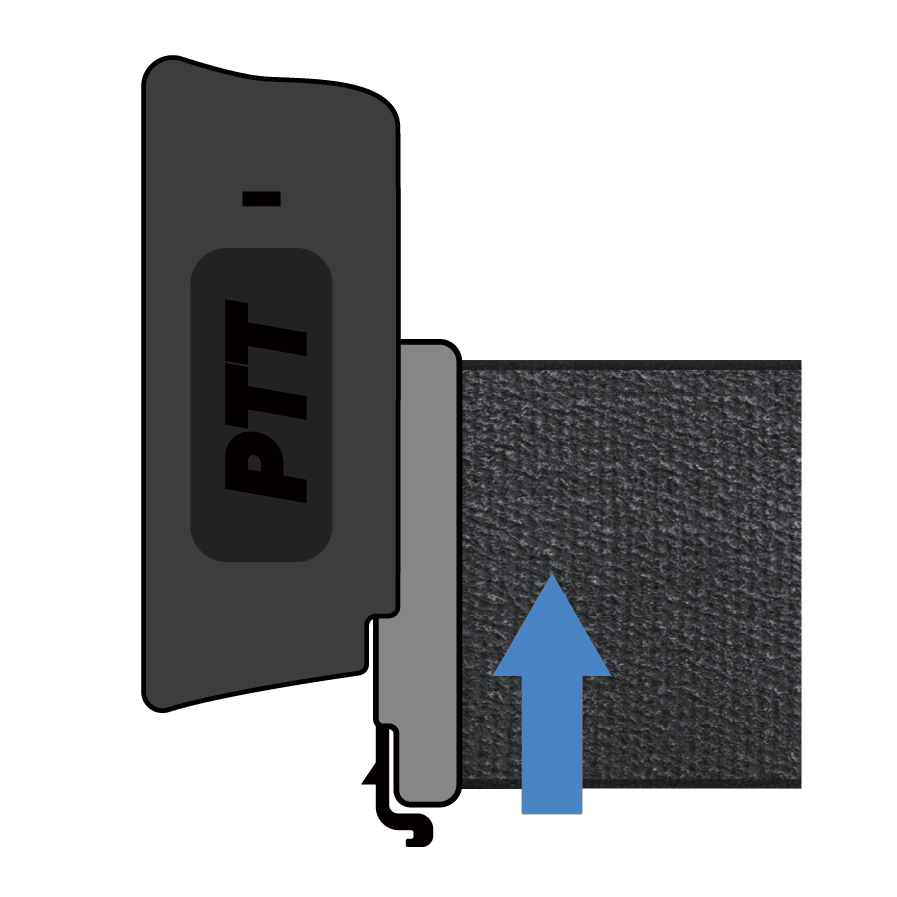
Strap Removal and Installation
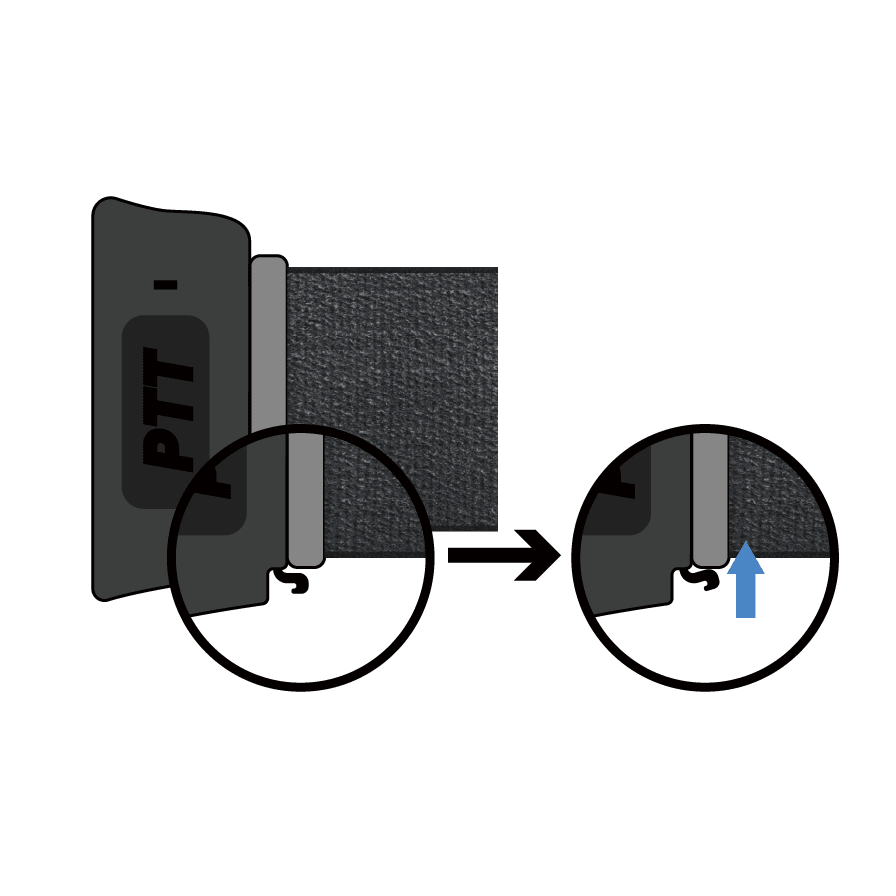
Removal Process

1
Locate the small lever under the strap buckle
2
Press the small lever upward

3
While pressing, slide the strap buckle downward to slide it out of the slot.
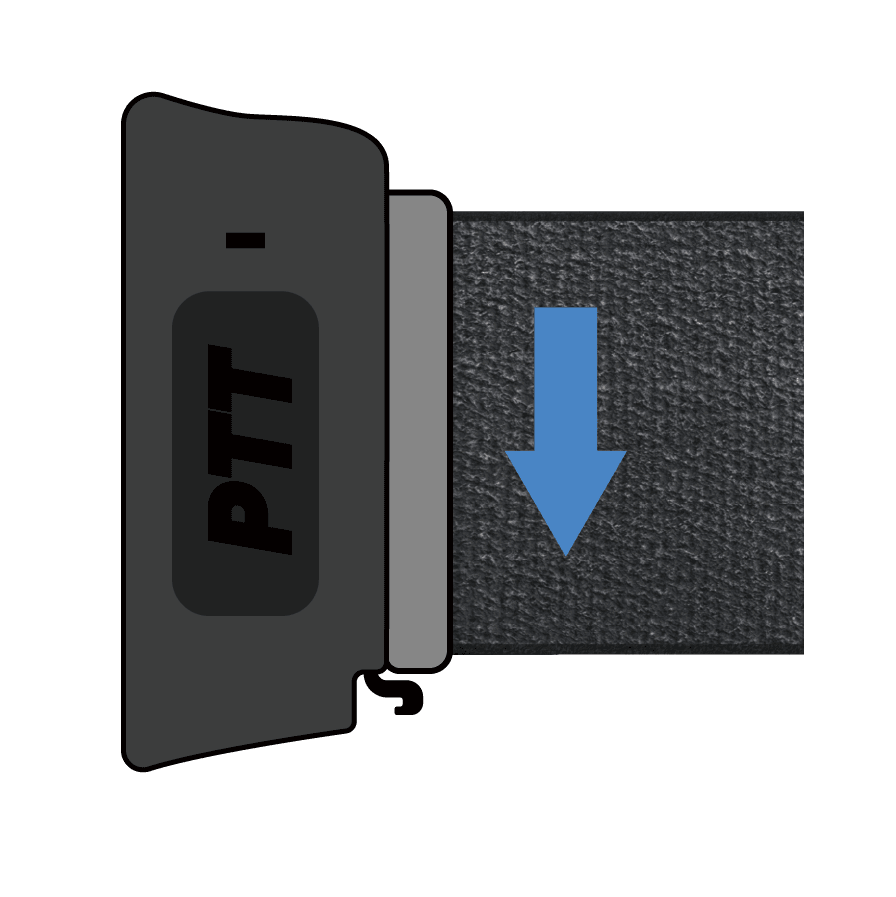
Installation Process

1
Refer to the diagram above to locate the slots on both ends

2
Slide the strap buckles from the bottom up into the slots.Continue sliding until you hear a "snap" sound, indicating that the strap is securely in place.
Please pay attention to the insertion direction of the head strap buckle, the wrench position should be downward